Part 5 - Navigation
Our Pyroes on Tour have already achieved a lot, but there is a drawback: we have a static set of components.
Even if we can dynamically show components, change classes and we could even think of re-rendering a component to be something different, the reality is that we are constrained to the layout we have pre-defined.
In order to overcome this limitation, we need to use routing. The concept is easy:
The route (i.e.: the url) will define which components will render on-screen
A route-outlet will indicate where the rendering has to happen
Copy the top4 folder to top5 and enter it. For example, with:
cp -r top4 top5
cd top5
Note
Under Windows and unless you have a proper shell installed (Cygwin, MSYS, GitBash, …) you are probably better off using the Windows Explorer to make a copy of the directory)
For the concept there will be:
A navigation bar in our application (
AppComponent)A
DashboardComponentwhich will be, so to say, the landing page after our application has been instantiated
And the known components
Our
PyroesComponentwhich displays the list of PyroesOur
PyroDetailComponentwhich allows us to edit the name of a Pyro. Because this is already a separate component, it can also be served in a different route.
Our final layout will look like this
The project layout now
├── app
│   ├── dashboard
│   │   ├── __init__.py
│   │   ├── dashboard_component.css
│   │   ├── dashboard_component.html
│   │   └── dashboard_component.py
│   ├── pyro_detail
│   │   ├── __init__.py
│   │   ├── pyro_detail_component.css
│   │   ├── pyro_detail_component.html
│   │   └── pyro_detail_component.py
│   ├── pyroes
│   │   ├── __init__.py
│   │   ├── pyroes_component.css
│   │   ├── pyroes_component.html
│   │   └── pyroes_component.py
│   ├── __init__.py
│   ├── app_component.css
│   ├── app_component.html
│   ├── app_component.py
│   ├── app_module.py
│   ├── app_routing.py
│   ├── mock_pyroes.py
│   ├── pyro.py
│   └── pyro_service.py
├── anpylar.js
├── index.html
├── package.json
└── styles.css
Notice that we will be adding:
A
dashboarddirectory for theDashboardComponentAn
app_routing.pymodule holding the definition of the routes
Before we define the routes, let’s define (or re-define) the different
components. Let’s start with the AppComponent
<h1>{title}</h1>
<nav>
  <a routerLink="/dashboard" routerLinkActive="active">Dashboard</a>
  <a routerLink="/pyroes" routerLinkActive="active">Pyroes</a>
</nav>
<router-outlet></router-outlet>
from anpylar import Component, html


class AppComponent(Component):

    title = 'Tour of Pyroes'

    bindings = {
        'pyroes': [],
    }

    def __init__(self):
        self.pyro_service.get_pyroes().subscribe(self.pyroes_)
The AppComponent
Our AppComponent has already undergone several changes.
The html content has:
A
<nav>structure with two anchors<a routerLink=...>defining the master navigation. TherouterLinkActiveis there to signal if the links have to be styled when the corresponding path is activeA
<router-outlet>tag Here is where the outcome of the routing will be deployed.
The Python part:
Has a
pyroes = []binding. This was previously in ourPyroesComponentwhich was always active. But this will no longer be the case.AppComponenton the other hand, being the bootstrap component, is always active and can offer the binding to children components.Kickstarts fetching the Pyroes from the service (remember the service is defined in
AppModule, which will be shown later in this example) This was also inPyroesComponentbefore and has been moved over here for the same reasons as the binding.Has lost the import of the different subcomponents. This is because the components are now routing-dependent and the import has to be taken care of when designing the routing.
The PyroesComponent
Our PyroesComponent has also to slightly change to accommodate the fact
that:
It is no longer the parent of the
PyroDetailComponentIt will simply ask the routing engine to go a route (which will of course use the right component) for edition
<h2>My Pyroes</h2>
<ul class="pyroes">
</ul>
from anpylar import Component, html


class PyroesComponent(Component):

    def render(self, node):
        # render under ul in render_pyroes when observable self.pyroes_ fires
        with node.select('ul') as ul:  # find node where to display the list
            ul._render(self.render_pyroes, self.pyroes_)

    def render_pyroes(self, pyroes):
        for pyro in pyroes:
            with html.li() as li:  # per-pyro list item
                # per-pyro anchor routing path with parameter pyd
                with html.a(routerlink=('/detail', {'pyd': pyro.pyd})):
                    html.span(pyro.pyd, Class='badge')  # show pyd as badge
                    html.txt(' {name}')._fmt(name=pyro.name_)  # obs name_
The Html part:
Has lost the tag
<pyro-detail>. This component no longer produces the instantiation of a subcomponent. It will route to somwewhere
The Python part:
Has no imports for Pyro or anything else related to the app. It is rather generic. There is obviously knowledge about which attributes the received data has (
pydandnameper pyro)Has lost the bindings
selectedandpyroes. Remember they have been moved toAppComponentwhich is active the entire time and controls the<router-outlet>(where this component will be displayed)It doesn’t init the
pyro_service, which is also done inAppComponentUses the binding
self.pyroes_, which will be sought in the parent, being the parent the component controlling the<router-outlet>Generates a
<a routerlink=('/detail', {'pyd': pyro.pyd})>linnk per received Pyro As it should be obvious from the syntax:
/detailis the destination path
{'pyd': pyro.pyd}is a dict contanining the named arguments (query string) for the destination path (i.e.: component that will receive it)
The PyroDetailComponent
As we have just seen … there will be named arguments coming to this component. It will obviously need some adaptations. Let’s see the changes
<div *_display=pyro_.pyd_>
  <h2 {name}="pyro_.name_.map(lambda x: x.upper())">{name} Details</h2>
  <div><span>pyd: </span><txt [pyro_.pyd_]>{}</txt></div>
  <div>
      <label>name:
        <input *_fmtvalue=pyro_.name_ placeholder="name"/>
      </label>
  </div>
  <p />
  <button (click)=router.back()>Go back</button>
</div>
from anpylar import Component, html

from app.pyro import Pyro


class PyroDetailComponent(Component):
    bindings = {
        'pyro': Pyro(),
    }

    def loading(self):
        self.pyro_service \
            .get_pyro(self.params.get('pyd', 0)) \
            .subscribe(self.pyro_)  # fetch async and fire self.pyro_ when done

    def unloading(self):
        self.pyro = Pyro()  # clear the editor on unloading: set null Pyro

    def render(self, node):
        pass  # the entire work is done in the html rendering
Our Html code:
Has replaced the references to the
selectedbinding with references to thepyrobinding. Just a matter of indicating that the component is acting without relation to other’s selection. It will display and edit a PyroHas a
<button (click)=router.back()>which should be almost self-explanatory.
This creates a button, binds to the
clickevent which will fireself.router.back()Note
self.router.back()could be seen as an install call and not as a call which has to be fired when the event happens.You can also say:
<button (click)=router.back>The machinery in AnPyLar will look for an ending parenthesis to detect this behavior and avoid making a call instead of a binding.
The important part here: the component has direct access to the routing engine
with self.router. There is no need to import anything and say anything
special. The facility is there.
The Python code:
Uses the
loadingandunloadingmethods. These are fired when the component is being loaded and unloaded from the DOM. Rather than recreating/destroying the component, what would be very expensive, the component is cached and given the chance to execute actions with each event.
Upon loading: it calls the pyro_service asking for an individual Pyro based on
self.params.get('pyd', 0)Note
we’ll see the modifications to the service later in the doc.
Remember: The
PyroesComponenthad links with:with html.a(routerlink=('/detail', {'pyd': pyro.pyd})):And as we pointed out above:
`pydwould be a named param for the receiving component. As seen there, this can be accessed withself.paramswhich acts like a standard dictionary.Note
self.paramsis an alias toself.route.paramswhereself.routeis an object containing information about the current route which navigated down to this component.Upon unloading: it sets the
pyroto a null Pyro (pyd = 0) to clear the editorThere is no need to
renderanything, because all is done in the Html code
The DashboardComponent
Having seen how the existing components have been modified, it’s time for the
new component. Just as before, we can easily generate the skeleton with (inside
the app directory):
anpylar-component Dashboard
And we put some content in the generated files
<h3>Top Pyroes</h3>
<div class="grid grid-pad">
</div>
from anpylar import Component, html


class DashboardComponent(Component):

    def render(self, node):
        with node.select('div') as d:
            d._render(self.render_top_pyroes, self.pyroes_)

    def render_top_pyroes(self, pyroes):
        for p in pyroes[:4]:
            with html.a(Class='col-1-4',
                        routerlink=('/detail', {'pyd': p.pyd})):

                with html.div(Class='module pyro'):
                    html.h4('{name}')._fmt(name=p.name_)
/* DashboardComponent's private CSS styles */
[class*='col-'] {
  float: left;
  padding-right: 20px;
  padding-bottom: 20px;
}
[class*='col-']:last-of-type {
  padding-right: 0;
}
a {
  text-decoration: none;
}
*, *:after, *:before {
  -webkit-box-sizing: border-box;
  -moz-box-sizing: border-box;
  box-sizing: border-box;
}
h3 {
  text-align: center; margin-bottom: 0;
}
h4 {
  position: relative;
}
.grid {
  margin: 0;
}
.col-1-4 {
  width: 25%;
}
.module {
  padding: 20px;
  text-align: center;
  color: #eee;
  max-height: 120px;
  min-width: 120px;
  background-color: #607D8B;
  border-radius: 2px;
}
.module:hover {
  background-color: #EEE;
  cursor: pointer;
  color: #607d8b;
}
.grid-pad {
  padding: 10px 0;
}
.grid-pad > [class*='col-']:last-of-type {
  padding-right: 20px;
}
@media (max-width: 600px) {
  .module {
    font-size: 10px;
    max-height: 75px; }
}
@media (max-width: 1024px) {
  .grid {
    margin: 0;
  }
  .module {
    min-width: 60px;
  }
}
The Html part is pretty dull, just a placeholder for the rendering that will be done in the Python part, with:
from anpylar import Component, html


class DashboardComponent(Component):

    def render(self, node):
        with node.select('div') as d:
            d._render(self.render_top_pyroes, self.pyroes_)

    def render_top_pyroes(self, pyroes):
        for p in pyroes[:4]:
            with html.a(Class='col-1-4',
                        routerlink=('/detail', {'pyd': p.pyd})):

                with html.div(Class='module pyro'):
                    html.h4('{name}')._fmt(name=p.name_)
Piggybacks on the observable
self.pyroes_(remember it’s defined inAppComponentwhich is the owner of the<router-outlet>)Renders the top 4 Pyroes and creates a link with an
<a
routerlink=...>
tag. Just like thePyroesComponentdoes, including the named argument for the routing:{'pyd': p.pyd}
The Routing
Done with the components. But this is about the routing and time to see it. The
routing is declared in the main module of the applicaiton: AppModule in the
routes directive. But to keep things clean and tidy will be declaring it in
a separate module and importing it.
from anpylar import Module

from .app_component import AppComponent
from .app_routing import AppRouting
from .pyro_service import PyroService


class AppModule(Module):

    components = AppComponent

    bindings = {}

    services = {
        'pyro_service': PyroService,
    }

    routes = AppRouting


    def __init__(self):
        pass
from .dashboard import DashboardComponent
from .pyro_detail import PyroDetailComponent
from .pyroes import PyroesComponent


AppRouting = [
    {
        'path': '',
        'redirect_to': '/dashboard',
        'path_match': 'full'
    },
    {
        'path': 'dashboard',
        'component': DashboardComponent
    },
    {
        'path': 'pyroes',
        'component': PyroesComponent
    },
    {
        'path': 'detail',
        'component': PyroDetailComponent,
        'params': {'pyd': int},  # param transformation function
    },
]
from anpylar import Observable

from .mock_pyroes import Pyroes


class PyroService:

    def get_pyroes(self):
        return Observable.of(Pyroes)

    def get_pyro(self, pyd):
        return Observable.from_(Pyroes).filter(lambda pyro: pyro.pyd == pyd)
Our app_module.py imports AppRouting from app_routing.py and sets
it as the value for the routing:
...

routes = AppRouting

...
As you may see above, the routes is list (or iterable) of dictionary entries. Let’s try to break the mystery:
{
    'path': '',
    'redirect_to': '/dashboard',
    'path_match': 'full'
},
If nothing else remains to be matched path: '' redirects to
/dashboard. This is the default for the entry path. path_match: 'full'
ensures that the matching of path is against the full url and not a
remaining url (which could be the case for children routes, which are not in
play here)
{
    'path': 'dashboard',
    'component': DashboardComponent
},
This says that when the remaining url to be matched is dashboard, the
component to be put in play in the <router-outlet> is:
Dashboardcomponent.
The next entry does the same for pyroes and PyroesComponent
And last but not least is the entry for the Pyro editor.
{
    'path': 'detail',
    'component': PyroDetailComponent,
    'params': {'pyd': int},  # param transformation function
},
This one includes a params entry and a dictionary which declares the name
of the param to be pyd and which transformation function has to be applied
when the query string is read from the url (in this case: string will be
converted to int … if possible)
Transforming ensures consistency, be it because of internal routing (an int
is probably specified by other components) or because of a pasted
url in the browser (which is for sure text at the beginning)
Let’s not forget the pyro_service. Remember that the editor was using a new
method named: pyro_service.get_pyro(pyd=xxx). From above:
def get_pyro(self, pyd):
    return Observable.from_(Pyroes).filter(lambda pyro: pyro.pyd == pyd)
Just like get_pyroes returns an Observable, so does get_pyro, which
filters the Pyroes (recall they are a mock database) for the sought pyd
Let’s execute
With all that in place, we can go for it:
anpylar-serve top5
And go the browser
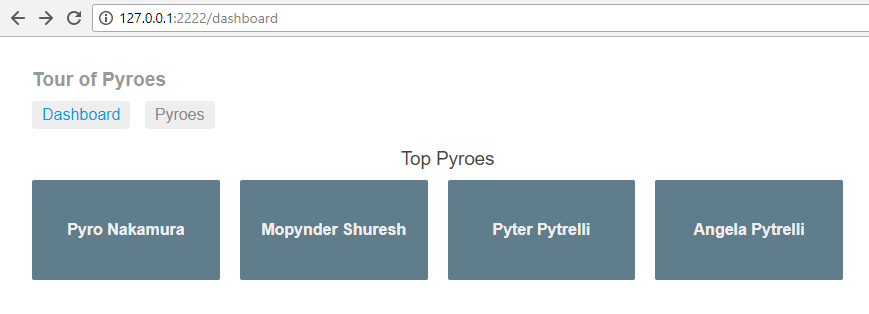
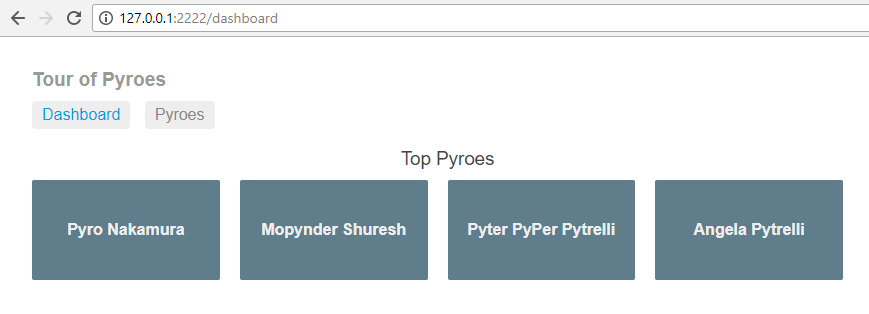
The application has recognized our intent to go to the homepage and as
indicated in the routing … it has taken us to the /dashboard route and
with it to the DashboardComponent
Notice also in the picture how the Dashboard navigation button is
highlighted. Recall that this is because we specified routerLinkActive
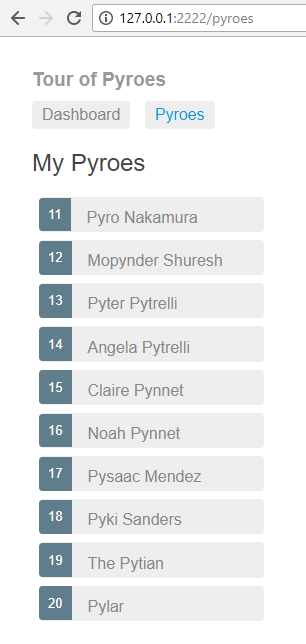
If we click on Pyroes, we are taking to the familiar list of Pyroes and
the url in the browser changes to /pyroes
Hitting the browser’s back arrow takes us back to the Dashboard and the
forward arrow takes us again to the Pyroes part. All within
application, not needed to go the network.
From either the Dashboard or Pyroes just click on the name of a
Pyro and let yourself be taken to the editor.
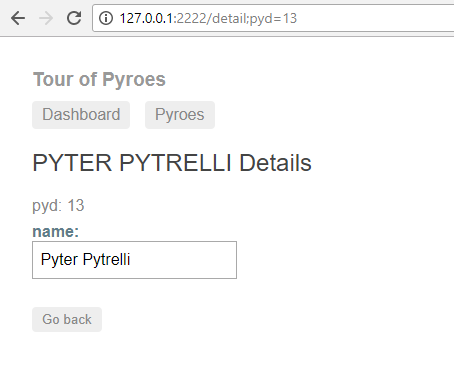
Notice that neither Dashboard nor Pyroes in the navigation buttons are
highlighted. And that’s because the current route is neither of those.
And:
The route contains the parameter which identifies our Pyro:
http://127.0.0.1:2222/detail;pyd=13That’s how the component knows which Pyro has to be edited.
Note
The AnPyLar Simple Server supports direct pasting of such URLs. Try pasting: http://127.0.0.1:2222/detail;pyd=15
Of course, in a real-life environment, things like authorization, existence of the
pydand many other things would need to be checked.
Make some changes to the name …
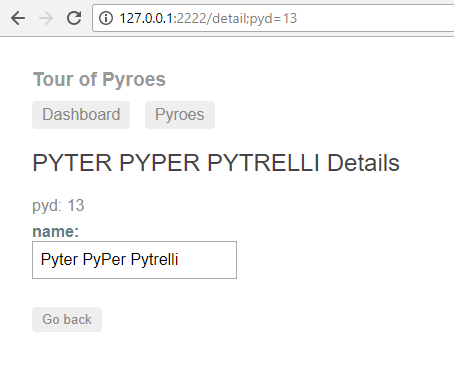
And then choose your path:
Click
Go BackUse the browser’s back button
Click either of the navigation links:
DashboardorPyroes
Simply play with the navigation. Here we’ll click on Go Back and go back to
the Dashboard where the editions are already taken into account
That’s all … it’s about time to go to the network … in the next chapter.